STD96 Guide
Overview 1.0
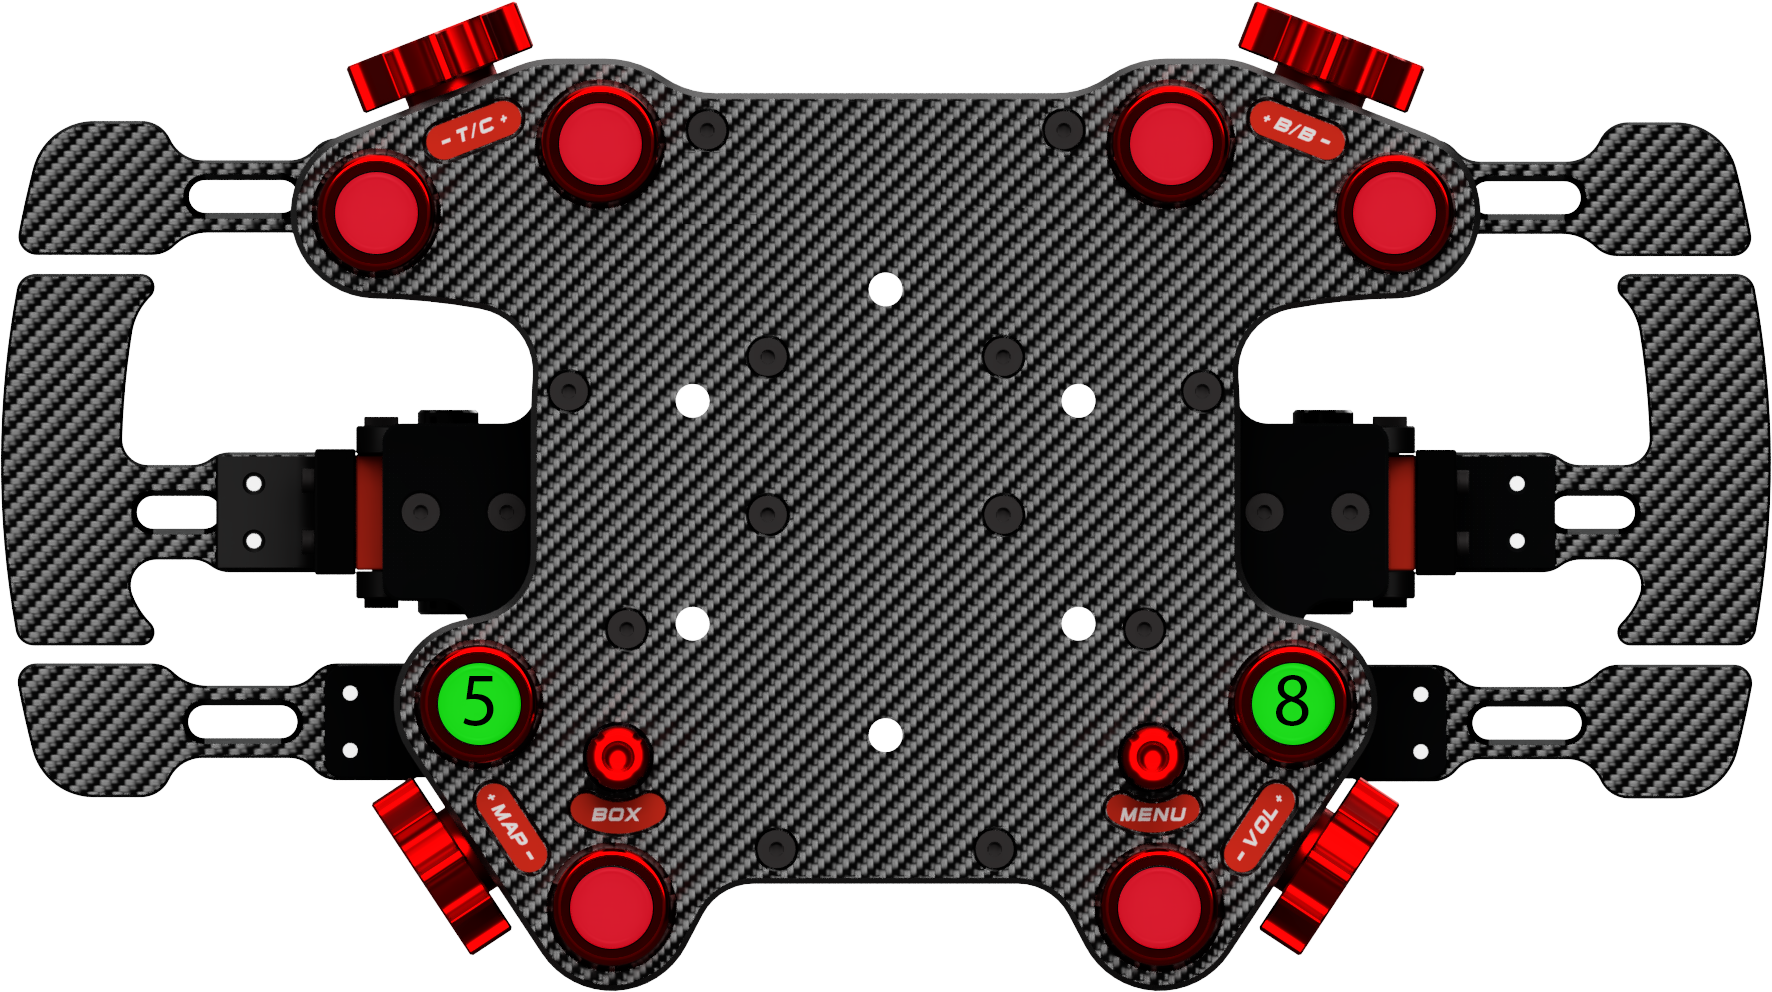
STD-96 is our flagship Simucube compatible wireless wheel button box

Key Features:
- 8 Halo Push Buttons
Tactical custom made button assembly - 4 Push Button Thumb Encoders
Perfectly tuned to be used with a single finger and paired with 6061 Aluminium CNC machined and anodized knobs - 2 Seven Way Switches
7 inputs per spot to help you navigate through menus and in-car settings while you drive - Gen8 Shifters
Our brand new multiadjustable high precision ball bearing loaded Gen8 shifters with carbon fiber paddles and user added sound dampeners - Optional Gen5 Dual Clutches
Adjustable ball bearing loaded clutches that can be configured using True Drive software,
Made out of CNC machined 6061 Aluminium with carbon fiber paddles - Optional Top Paddles
Add 2 extra top paddles for on the fly adjustments like brake ballance or traction control without taking your hands off the wheel - Highest Quality Components
Real carbon fiber front plate and 6061 aluminium CNC machined anodized black back case
All knobs are also made out of CNC machined and anodized 6061 aluminium - Rechargable Battery
Fully recharge the internal battery in 2 hours with the included USB C cable
Average duration per charge 8-12 months - Wide Rim Compatibility
It is compatible with most popular steering wheels including our FW series carbon fiber rims, Sparco P310, Momo Mod30, OMP superquadro, OMP Kubic, Turn R20 and many more. - Extra Labels
Plate comes with a sheet of multiple labels in matching colours for the encoders and the 7 way switches and a sheet of clear labels for the Halo buttons to help you customise all the input positions
Getting Started: 2.0
Requirements: 2.1
- This wireless wheel requires a Simucube 2 Wheel Base.
- This device must be charged approximately every 8-12 months using the included USB-C cable. The device should take around 2 hours to reach full charge.
- This device requires the installation of Simucube True Drive. This software is available for download here: Simucube 2 True Drive releases.
Connecting Wheel: 2.2
After installing the Simucube True Drive software either follow this video from Simucube or follow
instructions below to connect the
wheel to your computer for the first time.
- Ensure Simucube 2 direct drive base is powered on and set up
- Open True Drive 2 Software
- Select Wireless Wheel tab (second from top)
- Power on the wheel using the switch on the rear of device
- It should now appear in the list of available devices
- Within 10 Seconds of powering on the device double click on it to connect it
Simucube Button: 2.3
The Left Funky Switch acts as the Simucube Button and gives control over force feedback parameters
directly from the wheel.
- To enter the Simucube Button mode press and hold the Left Funky Switch for 1 second.
- Then select the parameter you want to adjust by pressing the Left Funky Switch in one of the directions below.
- Up: Overall Strength
- Left: Damping
- Right: Simucube Force Reconstruction Filter
- To increase/ decrease the parameters value rotate the left funky switch.
- Holding the Funky switch in the direction of a parameter for 2s will revert it to it's previous value.
- To exit the Simucube Button mode press and hold the Left Funky Switch for 1 second.
Battery: 3.0
Charging: 3.1
To charge follow these steps:
- Connect the included USB-C cable to the bottom of the wheel and the other end to a 5v USB power source
- For a full charge from 0% to 100% expect it to take around 7 hours however with regular charging this time will be much shorter
Sleep/Wake: 3.2
To save power during inactivity the wheel will disconnect automatically. This is triggered when the
wheel has not rotated more than 10 degrees or had any buttons pressed for 1 hour.
- To wake the wheel from sleep mode pull both clutches in and it should automatically reconnect.
- To manually disconnect the wheel without switching power off pull in both clutches for 5 seconds.
Storage: 3.3
If the wheel is going to be stored or not used for a long period of time it is recommended to charge it to approximately 50% then turn the device off using the switch on the rear of the device.
Clutches: 4.0
Note: The clutches are an optional extra and may not be included with your wheel depending on your configuration.
Setup: 4.1
Before use the clutches need to be calibrated in the true drive software. To do this follow these steps:
- Open True Drive 2 Software
- Select settngs tab (second from bottom)
- Click on the Configure Analog Inputs button
- A new window will open. Click the wireless wheel tab at the top.
- Assign master and slave clutch to your preferred side or alternatively assign it a different role depending on how you want to use the analog inputs
- Make sure each clutch is fully released then raise Deadzone lower value for each clutch to 2% higher than the raw input
- Press each clutch fully and then lower the Deadzone upper value to 2% lower than the raw input
- Go back to the simucube 2 tab at the top of the window and assign to the Clutch axis the Wheel Clutch input
- To save settings and complete the setup press the ok button at the bottom of the window
Adjusting Bite-Point: 4.2
The Bite-Point of the clutch can be set by following the steps below:
- Press and hold the buttons shown here for 2 seconds to enter bite-point mode
- adjust Bite-Point in 1% increments by turning lower right encoder or by 0.1% using the lower Left Encoder
- press and hold the buttons again for 2 seconds to exit bite-point mode